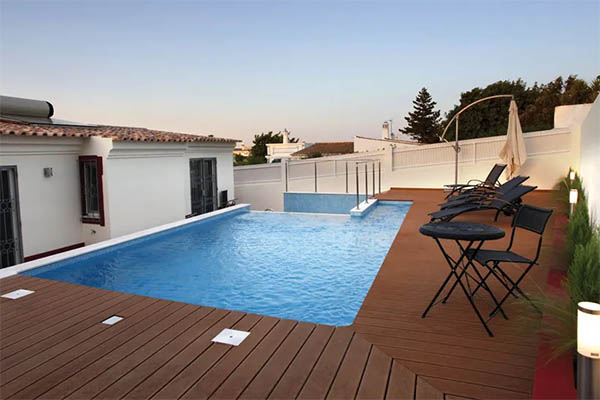
I. Pre-Installation Preparation
1. Flooring Preparation: Keep the flooring flat, clean, and free of water and dust.
2. Material Inspection:
Check the quantity, specifications, and color of the WPC decking.
As well as the integrity of the accessories and ensure there are no damage.
3. Tools: Saw, hammer, measuring tape, level, moisture-proof mat (if necessary), etc.
4. Acclimatization:
Before installation, allow the WPC decking to acclimate to the installation environment for 48 hours.
This will facilitate installation and control thermal expansion and contraction.
II. Moisture-Proof Layer Installation
1. Lay a moisture-proof membrane on the flat foundation where the WPC decking will be installed to prevent moisture from affecting the flooring.
2. The moisture-proof membrane should overlap by 10-15 cm and be secured with tape.
III. Pre-Laying and Arranging the Decking
1. Arranging the decking: Flooring is generally laid along the length of the foundation for a better look.
2. Pre-Laying Planning: Measure the overall dimensions of the space first to confirm the joint direction and cutting dimensions to avoid a narrowing effect later on.
3. Gap Management: Leave a 5-10mm expansion gap between the floor edge and the wall to accommodate thermal expansion and contraction.
IV. WPC Decking Install
1. Concrete Baluster Installation Steps:
- Installing the Baluster: Measure the room dimensions beforehand. Once you have these measurements, determine the direction in which the bassinets should be laid, ensuring they are perpendicular to the length of the flooring.
- Marking the Baluster Positions: Mark the centerline of the bassinets on the floor with a pencil. Keep a 40-50cm gap between each bassinet. Remember to leave a 5-10mm expansion gap in corners and along walls.
- Securing the Expansion Screws: Use an electric drill to drill a hole in the keel, approximately 1-2 mm larger than the expansion screw. Insert the expansion screw and gently tap it in with a rubber hammer until it is firmly seated.
- Securing the keel: Place the keel over the screw and secure it with a screwdriver or electric drill. Use shims to fine-tune the keel to ensure levelness.
- Leveling: Use a level to check the keel’s flatness along its length and fine-tune the shims if necessary. After all keels are in place, check the overall level again to ensure the planks are evenly laid.
2. Decking Installation:
- For the first row of decking, position the first floorboard with its male tenon facing the wall and its female tenon facing outward. Leave a 5-10 mm expansion gap with the wall and use shims to secure the gap.
- Snap-on Connection: Insert the male tenon of the second floorboard into the female tenon of the first floorboard, snapping it in horizontally or vertically. Gently tap the floorboard surface with a rubber hammer to fully tighten the lock, but avoid excessive force.
- Laying the Next Row: Align the male tenon of each floorboard with the female tenon slot of the previous row. Gently press or tap to secure the joints. After each row, check for flatness with a level to ensure there are no uneven levels.
- Edge Trimming: Measure the remaining gap at the wall or doorway. Use a power saw to cut the floorboards, ensuring a 5–10 mm expansion gap at the edge.
3. Edge Banding Installation:
- Measuring Length: Measure the length you need to cover the wall or doorway and mark the edge banding.
- Cutting the Edge Banding: Use a power saw or hand saw to cut along the marked edges, ensuring a smooth cut.
- Securing the Edge Banding: Align the edge of the floorboards or wall. Securing with Screws: Drill holes first, then secure with expansion screws. If the edge banding has a snap-on design, snap it directly into the wall or keel groove.
- Verifying the Installation: Confirm that the edge banding fits snugly against the floorboards, is flat, and does not lift.
4. Installing Expansion Screws:
- Locate the holes: Use a pencil to mark the drill holes according to the installation location of the keel or trim strip.
- Drill: Use a drill bit that is 1–2 mm larger than the expansion screw, and drill to a depth approximately equal to the screw length.\
- Insert the expansion screw: Insert the expansion screw into the hole and gently tap it in with a rubber mallet until it fits snugly.
- Secure the keel or trim strip: Align the screw head with the keel or trim strip and tighten the screw securely, but do not overtighten to avoid damaging the keel or wall.
Tips:
- Check the level after each row of flooring to avoid difficulty in subsequent adjustments.
- Do not overtighten the clips to avoid damaging the lock or causing cracks in the flooring.
- Tighten the expansion screws moderately to ensure the keel and trim strip are secure.
- Clips are available in plastic and stainless steel. Stainless steel clips are relatively sturdy and have smaller gaps. Plastic clips are generally the default.
- After installation, clean the surface of the flooring to remove any dust or debris.
- It is recommended to avoid moving heavy objects in the initial stage, maintain ventilation, and prevent long-term accumulation of water stains.